
Introduction
The Trotec Speedy 100 is a 60 Watt laser cutting machine with a working area of 12" x 24" (300mm x 600mm). See the bottom of this document for a list of acceptable and unacceptable materials to cut with this machine.
-
-
The basic functions of a laser cutter are as follows:
-
Cutting burns all the way through the media you are working on, so that after this process you can fully remove the separate piece from the larger board.
-
Single line engraving uses the same single fine line as cutting does, but only marks the surface and does not cut all the way through.
-
Raster engraving uses a rapid side to side motion while the laser is activated to mark an area surface of the media without going all the way through.
-
-
-
The software platforms you will use for design and preparation in this lab are Rhino and CorelDraw. These softwares are both loaded onto the lab computers which are connected to the laser cutters.
-
Files for laser cutting can be created in softwares such as Rhino 3D, AutoCAD, Adobe Illustrator, Inkscape, Solidworks, Inventor, and Fusion 360, and saved for use as .dxf, .ai, .eps, .svg, .pdf, or .bmp (for raster only) formats. These formats will all open in CorelDraw.
-
For simplicity, this guide will take you through the process using CorelDraw.
-
-
-
Before anything, check these two things when importing a file from outside software:
-
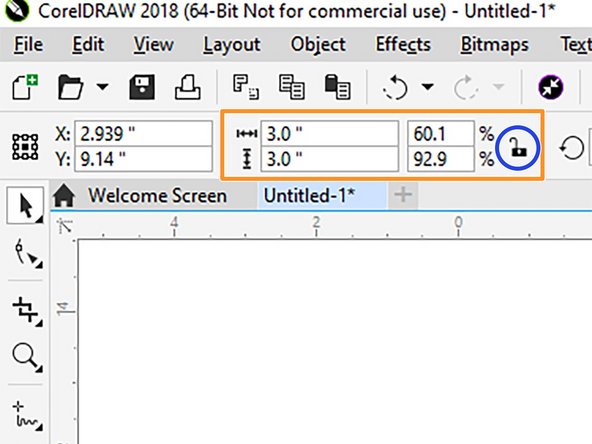
Make sure your geometry is the correct size. In CorelDraw, this can be done by window selecting your artwork and looking in the top left corner at the dimensions in the toolbar.
-
If you need to adjust the overall size of your artwork and want it to remain proportionate, make sure the padlock icon is set to the locked position when entering a value. It can be toggled by clicking the icon.
-
Check to make sure you have no duplicate geometry underneath your intended cut lines. This can be done by selecting any given line and deleting it to see whether there is a duplicate underneath. Edit>Undo to reverse the delete action if there is none.
-
If you have duplicate lines underneath each other, the laser will cut those lines twice, which can be a fire hazard or damaging to the parts you are cutting.
-
-
-
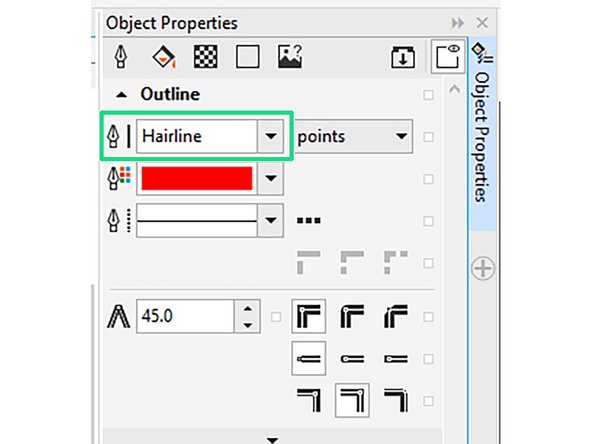
Ensure all lines to be cut (either all the way through or just single line surface marking) are set to Hairline lineweight.
-
Lineweight and color options can be changed using the Object Properties panel on the right side of the screen. If the object properties panel does not appear, go to Window>Dockers>Object Properties to make it appear.
-
Click on the object you wish to change, and select Hairline from the lineweight dropdown menu.
-
-
-
The Trotec software uses different RGB colors to differentiate between the operations of cutting and engraving. To designate colors to each entity, select and click the color swatch on the right side of the screen for the desired operation. Left click to change the fill color (raster only), right click to change the outline.
-
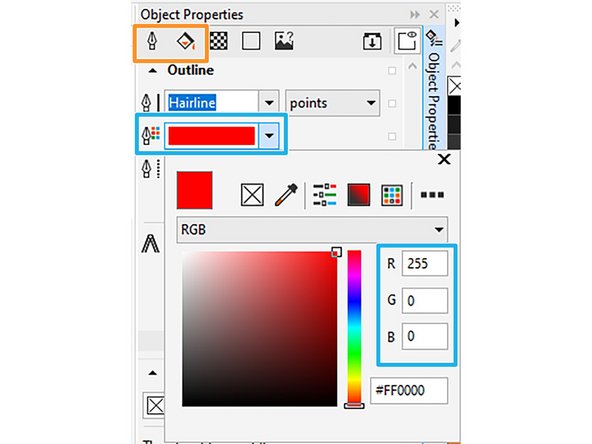
Colors can also be set in the Object Properties by using the color dropdown menu and entering the RGB values manually.
-
Select the paint bucket icon to change fill color (only used for rastering) or the pen nib icon to change the outline color (for cutting operations). Then select the color dropdown menu and enter the value.
-
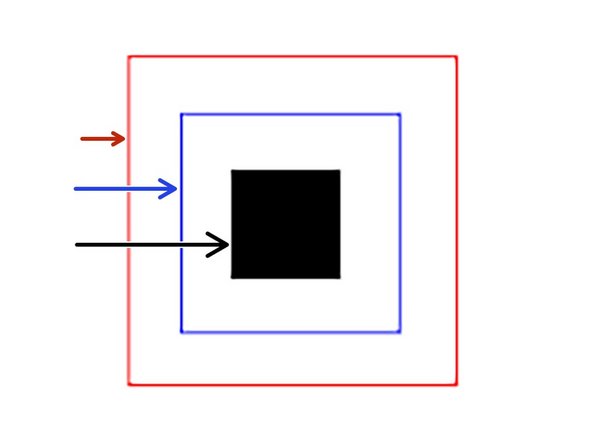
RGB Red (R: 255,G: 0, B: 0) is used for cutting operations which will go all the way through the material.
-
RGB Blue (R: 0, G: 0, B: 255) is used for single strike line operations which do not cut all the way through the material. for instance, fine detail line art.
-
RGB Black (R: 0, G: 0, B: 0) is used for raster operations, which use rapid back and forth motions to cover the surface of an entire area. The fill color of the object must be black in order to achieve the intended result.
-
-
-
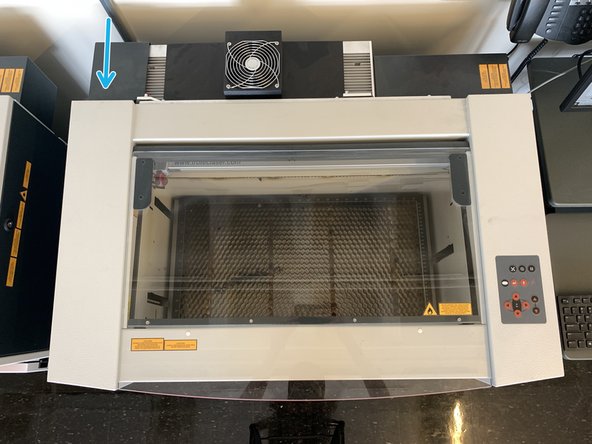
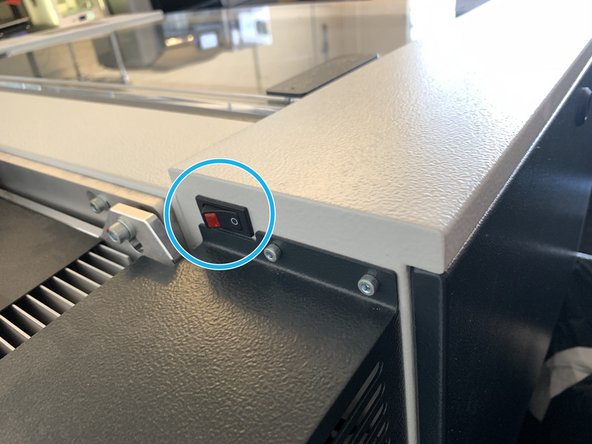
Flip the switch located on the back left side of the machine to power on.
-
The machine will go through an initialization procedure which involves the cutting table moving to the bottom of the machine and the cutting head will go through a series of motions before stopping.
-
The machine cover must be closed in order for the machine to initialize, or it will not function.
-
-
-
After turning on the machine, open the cover and place your media on the bed.
-
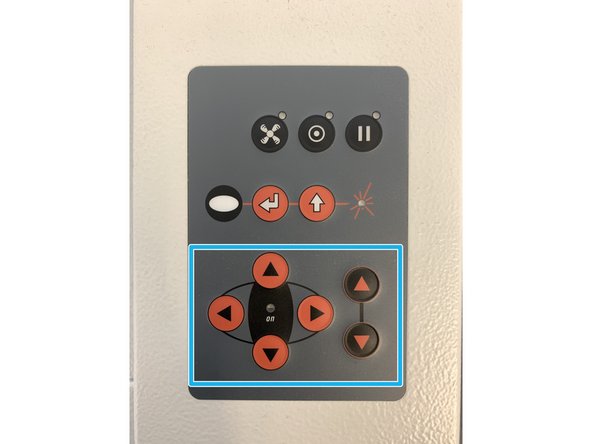
Be careful not to hit the carriage or air assist nozzle when inserting your media. If it seems you will not be able to insert it without doing so, use the X/Y arrow keys on the main keypad to move the carriage to the back left corner of the machine.
-
If you found the machine already switched on and the tabled is raised: if the cutting head will not clear your media as you insert it, on the machine's main control panel, use the down arrow key to move the table lower so your media will clear the cutting head.
-
Once the cutting head is clear of your media, use the X/Y arrow keys on the main control pad to move the cutting head over your intended cutting area.
-
-
-
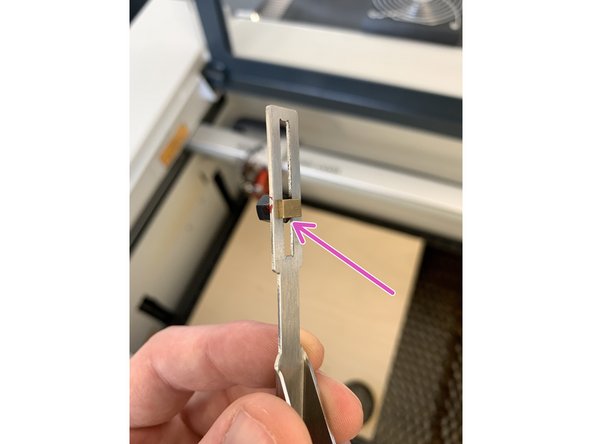
Take the focus tool from its storage location and place the small protruding edge onto the shoulder of the cutting head pictured. It will essentially be hanging by the edge on the focus tool (see next step for photo of this completed).
-
If the cutting head is clear of your media but still not enough to hang the focus tool, drop the bed slightly using the DOWN arrow key until it provides enough clearance.
-
-
-
Using the UP arrow key on the main control pad, raise the bed until the top of your media is a small distance from the bottom of the focus tool.
-
When it is about 1/8" from the bottom of the focus tool, tap the up key until it makes enough contact with the media to knock it out of position slightly, or just enough so that the focus tool falls off of the cutting head.
-
The laser is now focused. Place the focus tool back in its storage location and close the machine cover.
-
-
-
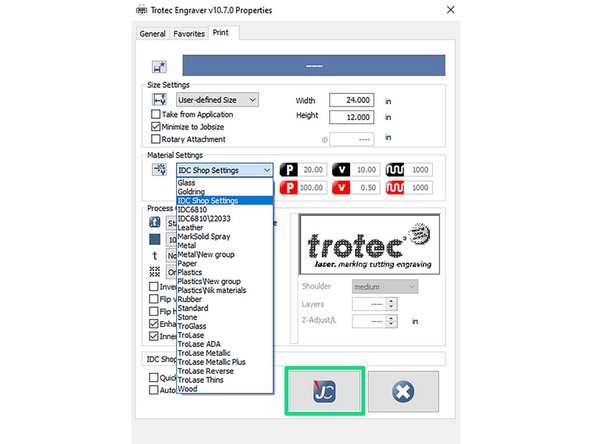
In CorelDraw, go to File>Print and select Trotec Speedy 100 from the list of printers, then select Preferences.
-
Select the category of materials from the upper dropdown menu in the Material Settings section, and then the specific material in the lower dropdown menu.
-
We have created a special folder with settings for the most commonly used materials and thicknesses, titled IDC Shop Settings. Look for this in the upper dropdown menu of the Materials Settings section, and the materials and thicknesses in the lower one.
-
When you have made your selections, click on the Trotec Job Control software icon to register those settings and return to the main print window.
-
Click Print. Upon doing so, the Trotec Job Control software will open (this can take a few moments), from which you will do the cutting.
-
-
-
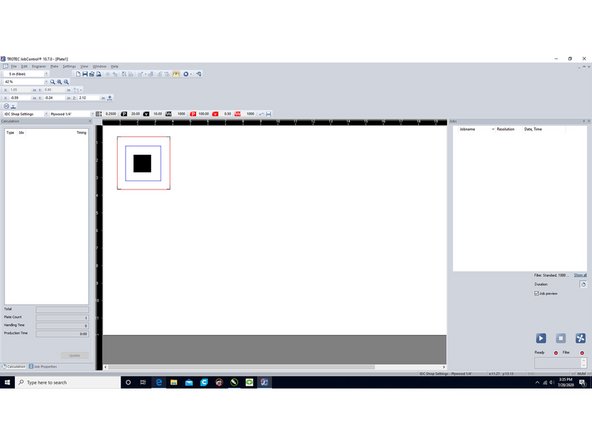
When the Job Control software opens, your file will be listed on the right side of the screen. To move it into the work area of the laser cutter, click and drag.
-
When the artwork is first placed in the work area, its preview is a blank grey rectangle. In order to see the actual artwork, you must select it and then click the eye icon in the top toolbar.
-
Your file can be dragged manually anywhere in the workspace. You can use the rulers at the border of the working area and at the edges of the laser cutter's work table for reference.
-
-
-
If you wish to be more specific in the placement of your artwork, do the following:
-
In the bottom right corner of the screen, click the icon which establishes a connection between the laser cutter and computer. The icon will change to a Play button.
-
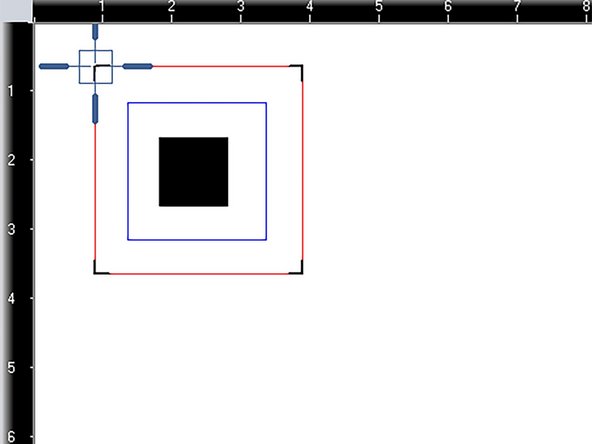
Using the X/Y arrow keys on the laser cutter's main keypad, move the cutting head over the area you intend to begin cutting. Use the red dot laser as an indicator of your position.
-
The position of the red dot laser will now be represented in the Job Control software as a crosshair in the work area.
-
Click and drag your artwork to snap whichever corner of it you wish to place at the current location of the cutting head.
-
-
-
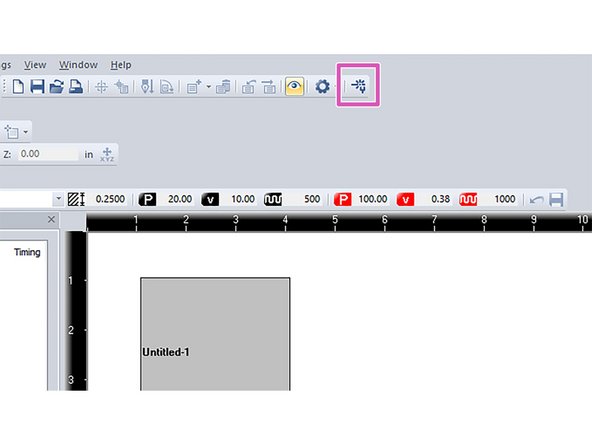
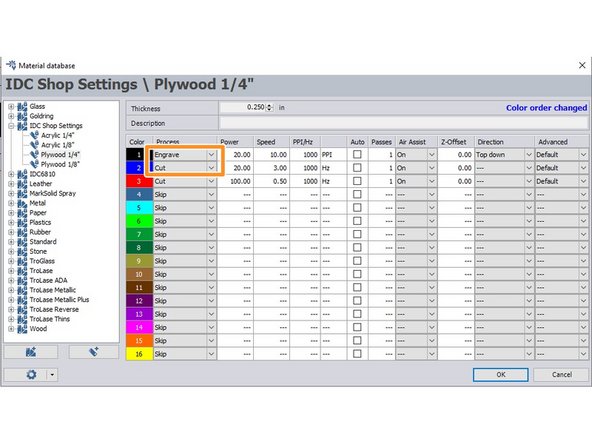
To check your settings before cutting, click on the wrench icon in the top toolbar. This will open the Parameters window.
-
Make sure you have selected the right material and thickness for the job.
-
Make sure that for each process you are using that it is assigned a function (Cut or Engrave). If a color has Skip listed next to it, the software will ignore it and do no cutting of artwork assigned that color.
-
When you have verified your settings, click OK.
-
-
-
After you have checked your settings and positioning, and are ready to begin cutting, close the cover of the machine.
-
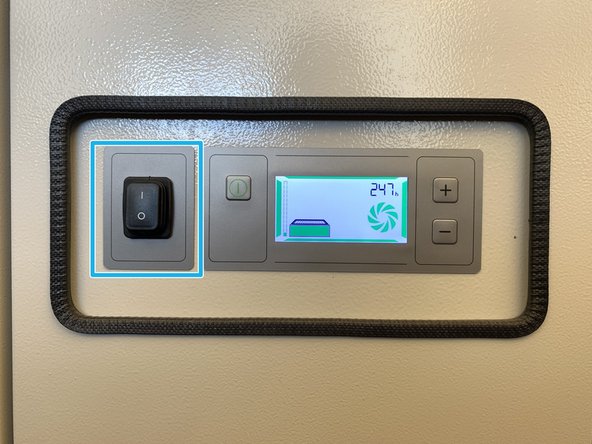
On the front, lower part of the laser cutter machine, there is a panel and switch to activate the exhaust system. Flip the switch to the ON position. The LCD screen next to the switch will light up to indicate it is running, and you will hear the blower cycling.
-
DO NOT BEGIN CUTTING UNTIL YOU HAVE ACTIVATED THE EXHAUST. THIS IS EXTREMELY IMPORTANT, OR YOU WILL CREATE TOXIC FUMES.
-
-
-
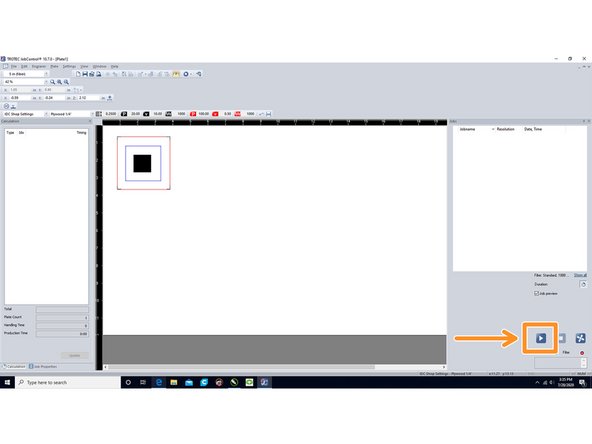
When you are ready to cut, click the Play button at the bottom right of the screen in the Job Control software to begin cutting.
-
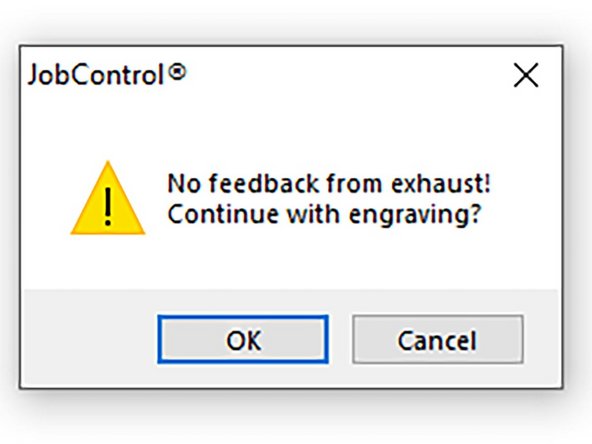
A warning window will pop up, stating 'No feedback from Exhaust! Continue engraving?' This is just to remind you to turn the exhaust on, which was done in the previous step. Click OK to close the window and begin cutting.
-
Do not walk away from, or turn your back on the laser cutter while it is operating. Fires can occur quickly and catastrophically.
-
Cutting can be paused by selecting the Pause button in the Control software window, or the hard Pause key on the machine control panel directly. To restart after pausing, hit the play button in the software again.
-
When cutting has finished, wait a few seconds for remaining smoke to clear and then open the cover to remove your part(s).
-
Before moving anything, check to make sure the cutting went all the way through your material by holding the cut part down and trying to lightly pick up the corner of the media. It should be separated. If you move your media in any way side to side it will be impossible to realign and you will have to cut again with fresh material.
-
-
-
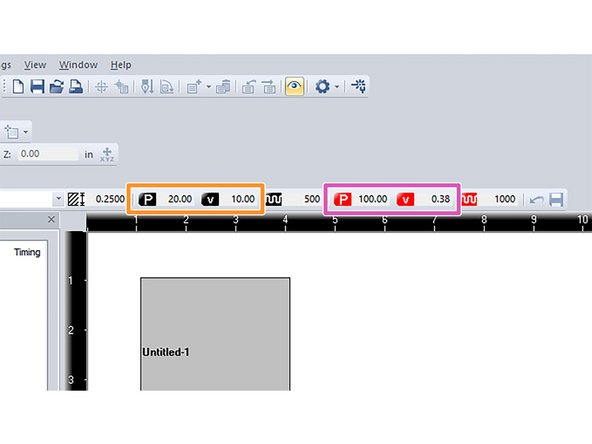
If your part did not cut all the way through, you will need to either decrease speed or increase power to achieve the intended result. This is done in the control software by adding or subtracting to/from the values in the power (P) and speed (V) entry fields.
-
It is recommended this adjustment be made in no more than increments of roughly 10% at a time, and that you adjust only one setting (power OR speed) at a time. Increasing/decreasing by more than that can result in excess burning or even fire.
-
The Trotec moves at a very high velocity, which is why the speed for cutting operations is well below one percent. Keep this in mind when making adjustments and make them in increments of .1-.2 percent
-
If you did raster and/or engraving on your part(s) and the end result is either too dark or too light, change the power or speed settings similarly as done with the cutting operation above, using the same guidelines for incremental adjustment of power.
-
Raster or engravings that are too light can sometimes just be run again at the same power settings used before, on the same part, because the raster will be performed over itself again. Increasing or decreasing settings is typically used when beginning a new cutting session.
-
Refer to the next step to learn how to re-run cutting of only selected or desired processes and shutting off others which do not need to be re-run.
-
-
-
Once you have cut your file, you must reset it if you wish to cut it again. It will appear on screen as a block of hatched lines. In order to cut it again, right click on it and select Job Reset.
-
If you wish to selectively cut part of your artwork again (for instance, if the laser does not cut all the way through the board on the first try), return to the Material Database menu again.
-
In the Process column, click the dropdown arrow next to each process you wish to turn off, and select Skip from the menu. This will ensure the selected processes will not be repeated.
-


Cancel: I did not complete this guide.
One other person completed this guide.
Attached Documents
2 Comments
Please consider creating a guide for using the rotary attachment!
Charles Finance - Resolved on Release Reply
Our middle school purchased a new Trotec Speedy 100 with a grant. There is SO LITTLE out there to help a newbie get started. This was a perfect walk through for a first job. I chose an image from the web, saved it as a .jpg, then followed your steps to burn my first job, a raster on veneer. Thank you for taking the time to create this resource.
Charles Finance - Resolved on Release Reply